Do you struggle to make heads or tails of architectural drawings?
Whilst Architects learn early in their training how to create and read architectural drawings, and some school curriculums offer technical drawing lessons, the average lay person may never have been exposed to this form of communication. Often the first time they enter the 2D world of plans, elevations and sections is when they are presented with a set of drawings illustrating the design of their new home. Without previous experience in reading these documents, it can be as daunting a prospect as early Egyptologists attempting to interpret hieroglyphics. Whilst 3D illustrations and physical models can help to understand the detailed nuances of any design, you need to be able to translate and understand the information contained within the 2D drawings.
The following guide is the first of two instalments that should unravel some of the mysteries associated with this medium.
The Purpose
Architectural drawings are used by Architects and others for many purposes. These include to develop a design idea into a coherent proposal, to communicate ideas and concepts to clients, to enable a building contractor to construct the design, or as a record of newly completed building work or a building that already exists.
Drawing Types
Depending on the purpose of the drawing, various types of presentation techniques are used.
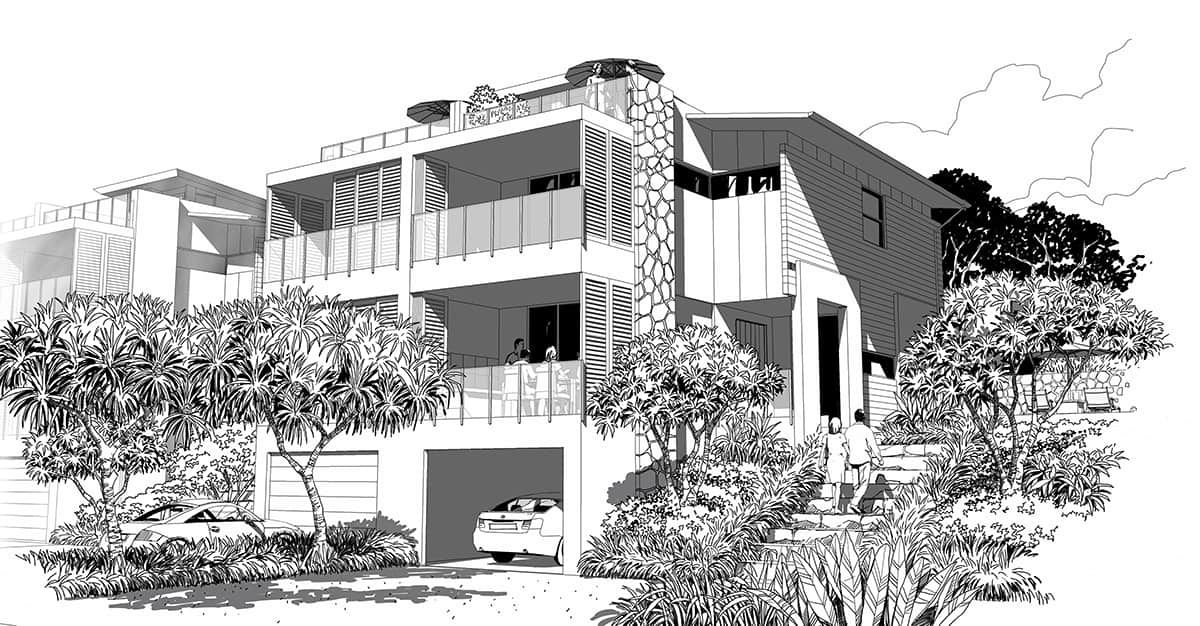
The early design process is typically referred to as sketch design, and as the name implies, the drawings used are generally hand drawn sketches illustrating indicative building layouts and building forms. These can vary from fairly “loose” rudimentary concepts, to more accurate scale-able drawings used to present the design intent to the Client. These can be further developed into presentation drawings, a more graphic representation of the design incorporating colour, texture, shadows, extraneous figures and furnishings, often complemented by perspective views.
Sketch of Noosa Sanctuary Residence https://leadesign.com.au/racv-noosa-resort-residential/
Once the design has been largely resolved, the drawings become more precise or “hardline” technical drawings, representing accurate dimensions and illustrating how the building is to be constructed. These act as the foundation for other specialist consultants to provide their design input, contractors to price the work, and the builder to construct the project.
For more information about the various design and documentation stages that utilise these different drawing types refer to https://leadesign.com.au/principal-architect-services/.
Drawing Conventions
Architectural drawings are made according to a set of universal conventions;
- Sheet sizes.
- Defined views
- Methods of measurement
- Annotation and graphics.
This guide explains the first two of these conventions, with the balance covered in a subsequent instalment.
Sheet Sizes
Conventionally, drawings were manually drafted on drawing boards using ink pens on various types of paper that allowed for ease of reproduction. The sheet size was determined by the size of the drawing to be illustrated, and drafting conventions that typically defined the scale of the particular drawing content that was best suited for the legibility of the drawing.
For an interesting overview of the fundamentals of the rapidly disappearing skills associated with manual drafting techniques refer to https://www.designingbuildings.co.uk/wiki/Manual_drafting_techniques
With the advent of computer aided drafting (CAD), drawings can be viewed at any scale on a computer screen by simply using a mouse scroll wheel to zoom in and out, however sheet sizes are still important when exporting these drawings as hard copy prints for external use.
The most commonly used sheet sizes for architectural drawings are the A and B series based on the ISO 216 International Standard – https://en.wikipedia.org/wiki/ISO_216.
The A0 size of paper is the largest in the A series, defined as having an area of 1m2 and a fixed height to width ratio. Successive paper sizes in the series (A1, A2, A3 etc) are defined by halving the preceding paper size across the larger dimension. This also effectively halves the area of each sheet.
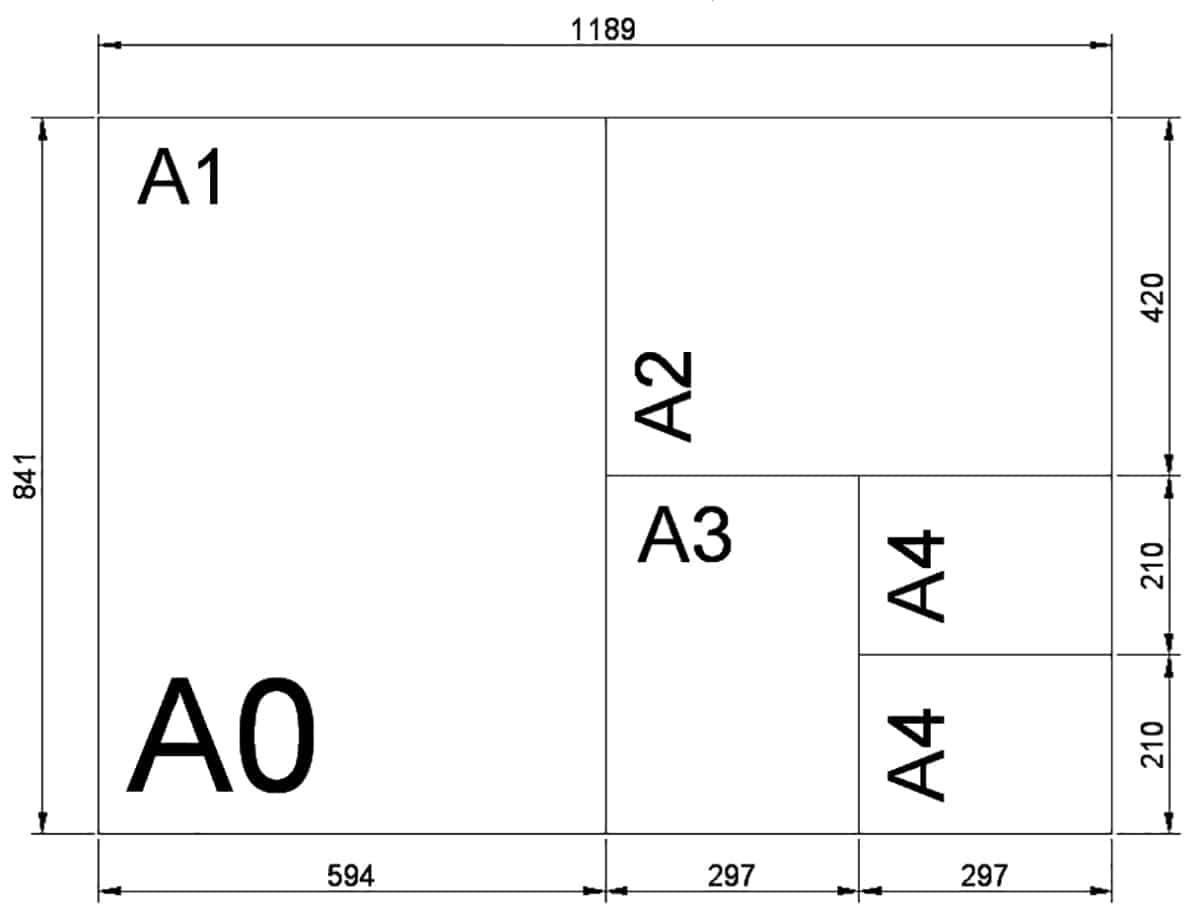
The B series is less commonly used. BO being the largest sheet size in the ISO range is generally only used when an AO sheet is not large enough to contain a drawing.
A useful benefit of the various sheet proportions is the relationship between sheet size to drawing scale. Whilst not the obvious relationship, halving the sheet size does not double the scale as might seem logical since the reduction in size only occurs in one axis along the larger dimension. Halving it again however equates to a uniform shrinking of 50% about both axes, resulting in a uniform change of scale. Consequently, an A1 sheet containing a drawing at 1:50 scale when reduced to A3 size will produce a drawing at 1:100 scale.
Defined Views
Architectural drawings consist of a set of defined views or orthographic (parallel) projections used to illustrate a 3D object. These are typically plan, elevational and sectional views.
These views are presented on drawing sheets which also incorporate additional key information that assists in their use and interpretation including;
- The project title, site location and Client’s name.
- The name and contact details of the architectural practice and drawing author
- The drawing title or description.
- The project number or code.
- The drawing number and issue version
- A revision schedule to identify any changes made between issues.
- The scale of the drawing at a specified sheet size.
- The date the drawing was produced or revised.
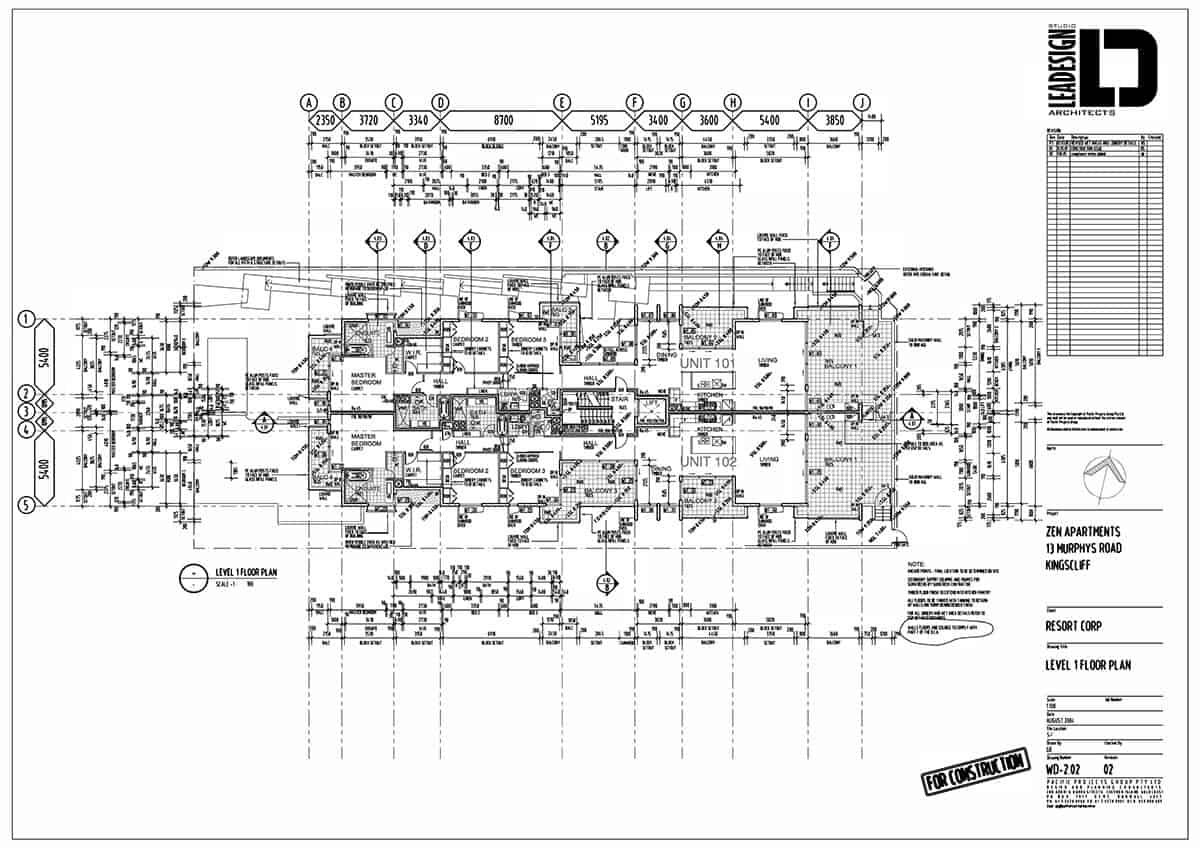
Plan from Zen Apartments, Kingscliff
Most architectural drawing sets will include the following key drawings, which are often grouped into a series identified by the drawing number prefix, eg plans could be designated as 1.01 – 1.06, whilst elevations might be 2.01 – 2.04.
Site Plan
A site plan is a specific type of plan, showing the whole context of a building or group of buildings relative to the site. The buildings are usually represented as a footprint, or as a roof plan, and show the relationship to property boundaries and surrounding roads or adjoining sites.
Convention dictates that the site plan is positioned so that north aligns directly up the page, however where this is not practical, a north point symbol will identify north relative to the site.
The scale of a site plan is determined by the size of the site and the ability to fit it onto a specific sheet size.
Floor Plans
A floor plan is the most fundamental architectural diagram, a view from above showing the arrangement of walls defining spaces at a level within the building, similar to the representation of streets on a map.
Technically a plan is a horizontal section cut through a building conventionally at 1.2m above floor level showing walls, windows and door openings and other features that are traversed at that level. The plan view includes anything that could be seen below that level. Objects above the plan level (e.g. roof overhangs) can be represented as dashed lines.
Like the site plan, it is traditional to orient the floor plan on the sheet with north aligned up the page, or to include a north point identifying the actual direction of north where a different relationship exists.
Floor plans are typically produced at 1:00 scale, however for larger building footprints, these can be reduced to 1:200 or even smaller where required to fit the entire building onto the designated drawing sheet. Components of the plan are then shown at the larger scale on additional drawings to ensure the level of detail is maintained.
Elevations
An elevation is a view of a building seen from one side, a flat 2D representation of one façade.
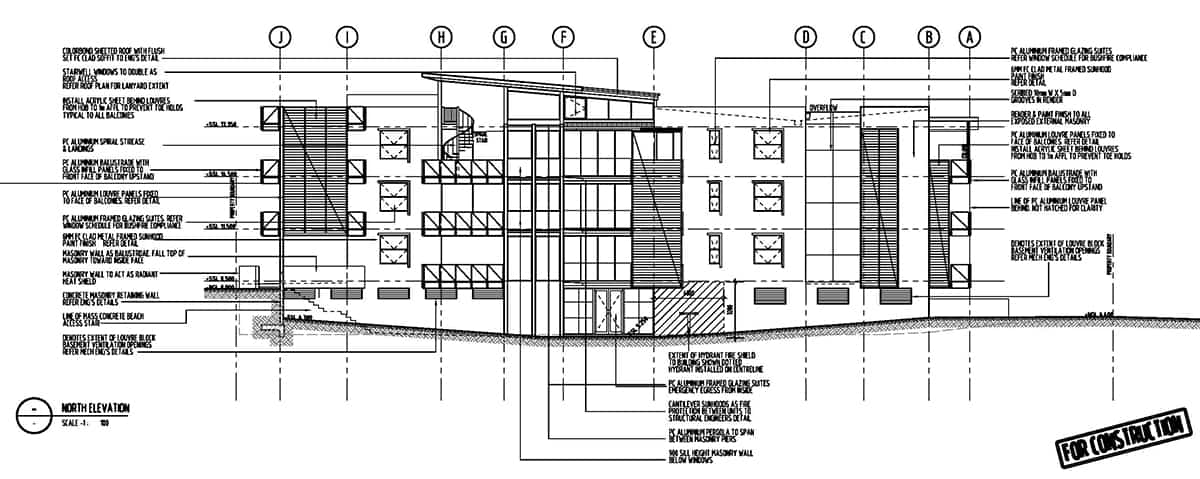
Elevation from Zen Apartments, Kingscliff
This is the most common view used to describe the external appearance of a building. Each elevation is labelled in relation to the compass direction it faces. Thus, a north elevation is the view seen when looking at the façade from the south.
A true elevation is used to describe a view that is aligned to a compass direction, boundary or other key site attribute like a street, regardless of whether the building façade is perpendicular to that viewing plane. This can result in different building facades being illustrated at an angle on the same elevation.
Elevations are produced at the same scale as the floor plans.
Cross Sections
A cross-section or section represents a vertical plane cut through the object, in the same way as a floor plan is a horizontal section viewed from the top. In the section view, everything cut by the section plane is shown as a thicker bolder line, often with a solid fill.
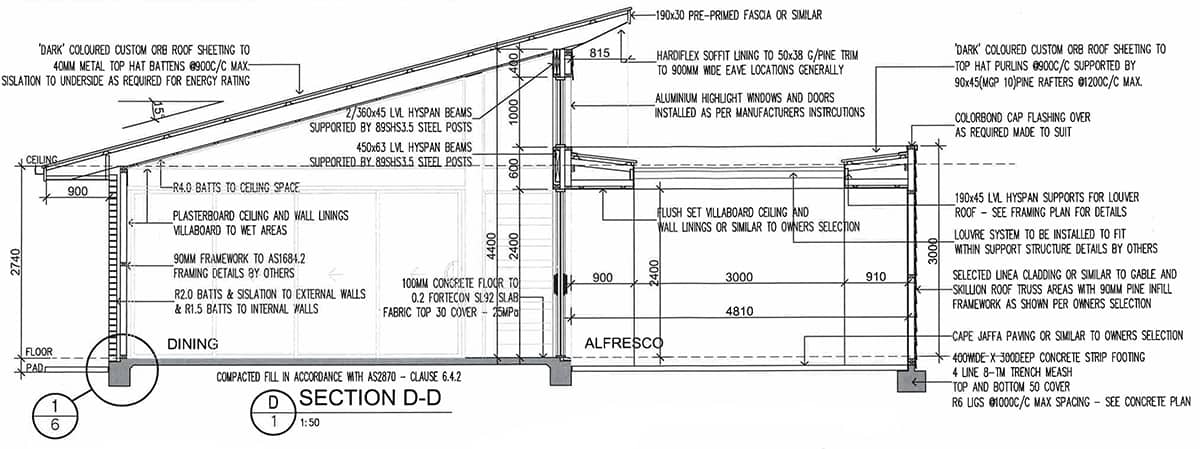
Section from Robe Residence https://leadesign.com.au/robe-sa/
Sections are primarily used to illustrate the relationship between different levels of a building and identify details that may be concealed or difficult to interpret from plans and elevations alone.
A sectional elevation is a combination of a cross section, with elevations or other parts of the building seen beyond the section plane represented using lighter line work.
Sections are typically produced at the same scale as the floor plans and elevations, with the location of the section cut identified by a dashed line and directional symbol on the plans, and elevations.
Detail Drawings
Detail drawings show a small part of the construction at a larger scale, to demonstrate how the component parts fit together or where certain finishes are applied. They typically show more detail of complex junctions or unorthodox construction techniques that the builder may not be familiar with and which cannot be shown in enough detail in building sections or elevations. Construction details can be shown in plan, elevation or as sections and are typical produced at larger scales varying from 1:20 to full size 1:1
Reflected Ceiling Plans
As the name implies, these are plans of the ceiling created as if viewing a mirror on the floor.
They are used to identify the ceiling profile and heights above floor level, as well as showing services such as A/C vents, and cabling between lighting and switches.
These plans are produced to the same scale as floor plans.
Now that you understand the purpose of the different views depicted on the drawings that constitute an architectural drawing set, part B of this guide will provide tips and tools to assist you in reading these drawings.


